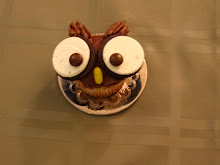
When I was a little girl one of my favorite things to do was drool over the 'Martha Stewart Weddings' magazine. The dresses were sparkly and glamorous, the favors adorable and the registry checklists hinted at a life of gleaming appliances and upscale coking. When I was forced, by the tyranny of space constraints, to send an issue to the recycling bin I would first lovingly snip out my favorite articles and pictures. What did I save? The tiaras? The destination honeymoons? Nope. It was the cake. Tiered, sculpted, cupcake, you name it. Something about those beautiful cakes filled me with glee. So it came as a shock to many when six months ago I got married...WITHOUT a wedding cake.
What you say? How could I not have a cake? Simple. This was a big wedding that was all ready costing an arm and a leg and wedding cake is not really part of my families tradition. So I didn't have one. I am a full believer in brides remaining in budget. Besides, if I couldn't have the cake I wanted I did not want to settle for something less. The caterer was all ready doing a plated dessert and there was no need for a cake. The wedding was everything I dreamed of and I have no regrets. What I do have is a manilla envelope full of cake clippings which now seems superfluous. What's a girl to do? Make her own cake!
This blog will chronicle my quest to become a professional level baker and cake decorator. I have always considered myself a 'baker' having learned to bake at a very young age at my others side. After looking at so many lovely cakes I cannot hold back the urge to create some of my own. One thing I know: cake making is expensive. There is a lot of equipment that I will need to amass and a lot of practicing that I will need to do. But I'm willing to stick it out, and I hope you are too! To start out I am armed with several books, some decorating supplies I 'borrowed' from my mother and a lot of excitement. Here's to cake.

 Another mini cupcake for the head, with coconut flakes for snow. Fill the corner of a sandwich baggie with chocolate icing, cut off the tip and use gentle pressure to pipe the small dots for the mouth. Always touch the bag to the cupcake as you release your pressure. This finishes off your dot and prevents it from pulling away. The nose is a cut piece of juju fruit. You can use taffy as well. For extra realism use a knife to score some lines in the taffy and then rub it in cinnamon for a real earthy carrot look.

